
Life Calendar Tutorial
Note that a few of these comments may not be applicable as the site is no longer hosted.
Introduction
Welcome to Life Calendar! With Life Calendar, you see the biggest picture you have — your life.
Here you can track your life in boxes from days to decades, planning out what you want to accomplish or writing down what happened. With simple formatting, you can save what's been going on in your life, set goals or milestones for yourself and — quite literally — color your life through images, notes, and more!
Likewise, we provide interesting infographics and visualizations about your unique life, including downloadable posters and beautiful statistics.
Sounds interesting? I hope so! It's super-simple to get started, which is what we'll be covering next. You can also move down to view some of basic or advanced features.
Getting Started
First Steps
While Life Calendar can be used without registering, we strongly recommend that you do. The only
time that we'll send you emails is when you choose to reset your password, and this allows you to login and view
your Life Calendar anywhere! Without signing up, you're data will be lost as soon as your computer shuts down.
You can sign up on the /signup page.
With that out of the way, it's time for you to submit your age expectancy quiz! As soon as you have successfully registered, you'll be redirected to a page where you can input your date of birth and life expectancy (which we can't see and won't share with anyone). If you aren't sure about what your life expectancy is, you can take our quick quiz with the click of a button or find a more in-depth online one.
Once you've submitted, you'll be redirected to the home page! Keep reading for an outline of how to use it!
Using the Site
Life Calendar is really easy to grasp and use. Let's go over how it works.
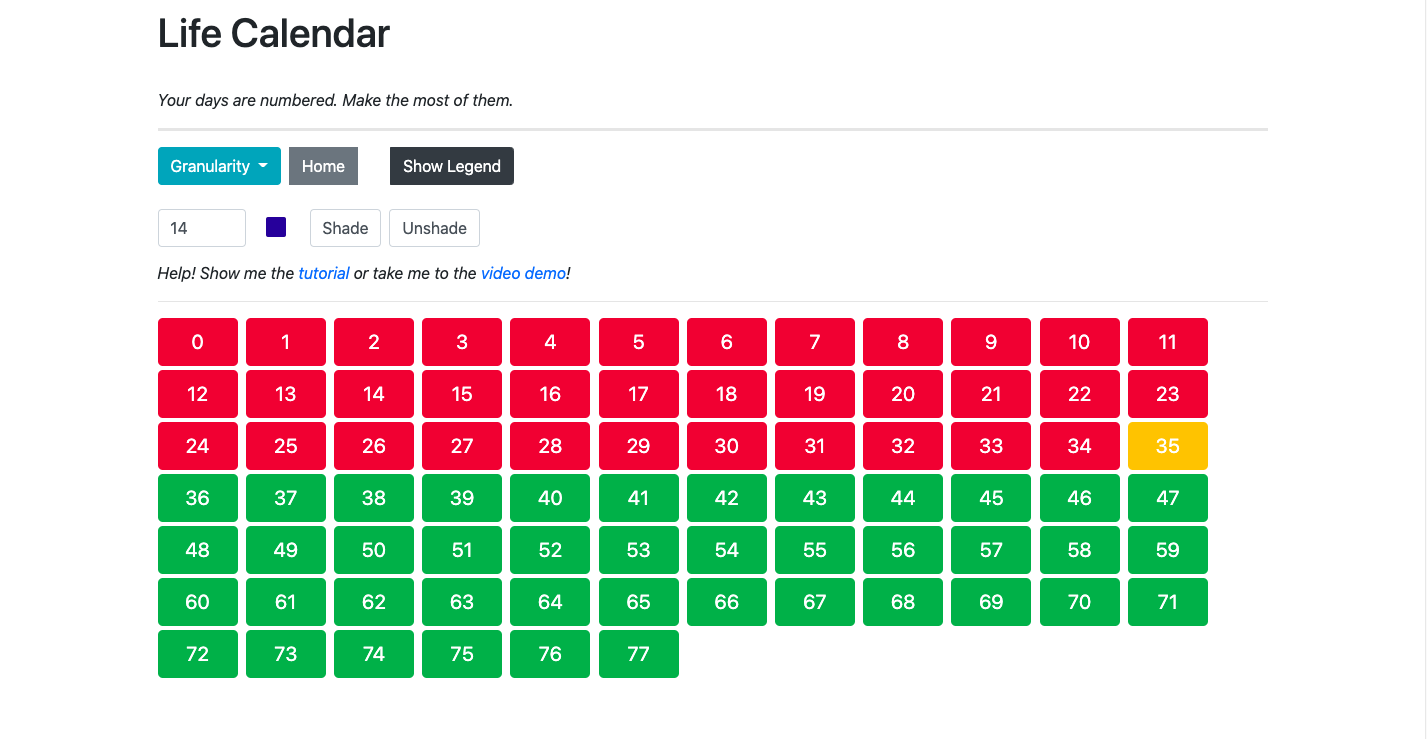
The core part of the website is on the / page (homepage). If you head over there, you'll see a ton of
colored boxes, as well as a couple of buttons at the top — something like the image below.
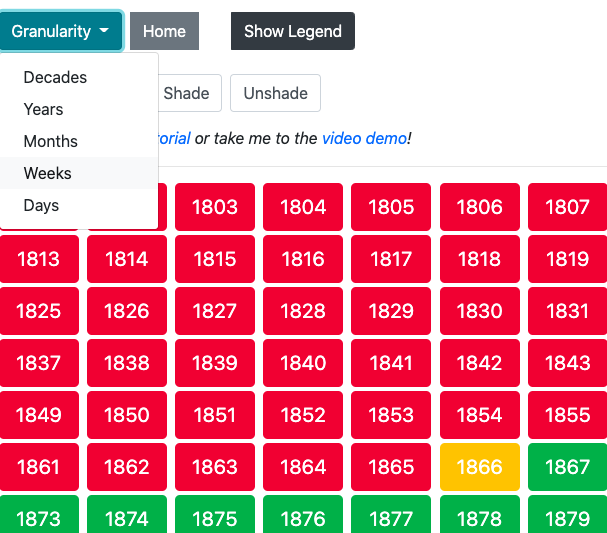
These boxes are life boxes, and they represent stages of your life. You can switch between different views by going to the 'Granularity' button at the top, and choosing what level you'd like to view your life at.
For the sake of this example, we will be looking at the weeks view. I'll head over to weeks by selecting it under 'Granularity'. Go ahead and try this as well — you should see 150 colored life boxes. At first, life boxes can only be green, yellow, or red. Green boxes represent life that you have left to live, yellow boxes the current box you're living, and red boxes what you've already gone through. At the bottom, you'll have the option to click back and forth between 'views' for larger pages. If you ever get too far ahead, you can click the home button to get back to the page you are currently living in. You can color-code these boxes as well, but we'll get onto that in a little bit.
The true magic is when you click on a box. At first, it will be empty, with buttons saying 'delete', 'edit', and 'cancel'. At the bottom. Let's try editing — we'll get a beautiful text interface!
I've chosen to edit my current week, and I'll type in my life box what I've accomplished and what I plan to accomplish this week — something like a diary or calendar planner.
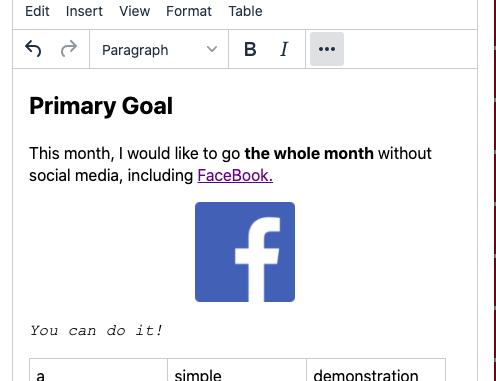
Once I'm done, I'll click 'Save Changes' — and voilà, my life box now has on it what I've written!
Now, let's get into some of the other features! We'll only be looking at these very briefly, because you can find out a lot more about each specific one under the basic and advanced feature explanation.
So another cool feature is the ability to color-code boxes. By selecting a number and a color, I can click shade (or unshade) to shade/unshade boxes, which can be used to represent parts of my life such as having vacation, having a good week, or being at a job.
Once you have shaded buttons with some colors, they will show up when you click the black 'Show Legend' button on the home page. There, you can see each color, a meaning, the hexadecimal code, and a clipboard button. You can edit the meaning (make sure to save your changes) and click the clipboard button to change the color of the color picker.
There are also a few other cool pages, such as the statistics and downloads page, which are self-explanatory (you can keep on reading for more details).
Another big page is the 'Goals' page, where you can set yourself goals. Again, it's fairly intuitive, and I won't go into too many details for the sake of brevity. You can read more at the feature explanation.
That's pretty much the gist of it! I'll outline some of the other features in more details below, but the real, personal magic is these little boxes that represent your life!
Basic Features
Shade Buttons
With Life Calendar, you can color-code boxes based on what happened during those timeframes! This can be anything from it being a day/week etc. you went out with friends to something more abstract such as a time when you learned something. In order to shade a life box/button, you need to go to the top of the home page and type in the number of the box for your current view (days, weeks, etc.) that you'd like to shade (or unshade).
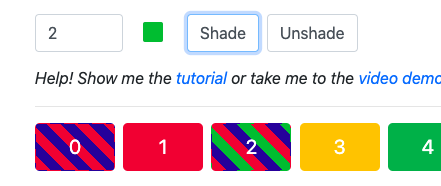
Then, you can use the colored box on the right to select the color that you would like to use, and then shade or unshade the box with that color! This color will then be added to the legend, which you can read about more here under Advanced Features.
Granularity
With the homepage 'Granularity' dropdown button, you can choose at which 'level' you view your life. The levels available are days, weeks, months, years, and decades. Each level has its own individual boxes, with unique box text and color tracking. This can be useful for whether you want to write out something that just happened on one day, shade that you had a bad week, or store your homework for the month, etc.
Card Interaction
Simply put, if you click on a box, you'll see three buttons at the bottom — edit, delete, and cancel. They, unsurprisingly, do what they say they do — add the ability to edit, delete, or cancel cards. If you choose to delete a card you'll be asked for confirmation as it is irreversible, and editing a card will allow you to enter the editing mode (default is Fancy).
Note: deleting cards only clears the content, and doesn't actually remove that life box.
Fancy Mode
Fancy Mode is the default mode that is used for editing cards. It is a smooth, modern editor with a lot of features, which are outlined below:
- Image upload
- Links and tables
- Text size and orientation adjustment
- Text and background highlighting
- ...and lots, lots more.
Have a look around and you'll find out some more cool features!
The 'Home' Button
This button is fairly self-explanatory. If you are in a larger 'view', such as days or weeks, and click far ahead (for example, to see the last expected week of your life), it is frustrating to click the Previous button multiple times to get to where you need to be. So, you can just click the 'Home' button to be able to get to the 'page' of your current life calendar view that has the box with which you are currently living.
We promise it will make more sense when you try it out. Perceptive users may also notice that the link on the
homepage contains the current page and view (for example, /?view=weeks&page=35. You can also
just the number after page to navigate to your desired page.
Advanced Features
Legend
The legend is the nifty little feature that keeps track of all button color shading. You can open it up by clicking the 'Legend' button, and should see something like the image below with all colors and hex codes.
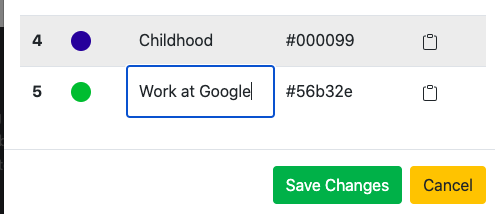
The main benefit of the legend is that you are able to click the 'set picker' button next to each color to change the color of the color picker used for shading/unshading. You can also manually type in the hexadecimal code.
Another important advantage of the legend feature is that (except for the first three representing past, present, and future parts of your life — change the meaning of each color. Simply go to the cell for the meaning of that color, and type in something. Make sure to save your changes!
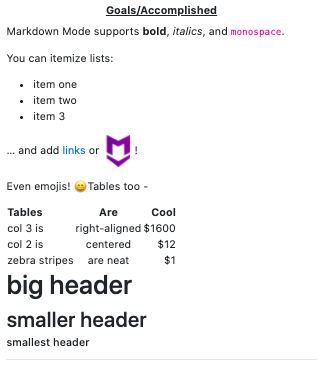
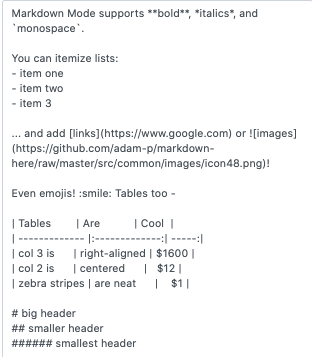
Markdown Mode
Markdown Mode is the minimalist version of Fancy Mode. You can easily switch between it and Fancy Mode with the link at the top of a life box when you edit it. Don't be discouraged by the lack of visual aids — Markdown is actually a very powerful markup language. It supports almost everything Fancy Mode does — links, images, tables, bold/italicized text, emojis — and is most suitable to those familiar with it or programmers. An awesome cheatsheet is available here that will have you be a Markdown pro in minutes.
Adding Images
Adding images is supported, although uploading custom images — for the time being — is not (due to costs associated with storing the images on our off-site server and this being a fully free site). You can add images in Fancy Mode by going to a life box -> edit -> insert -> image, then adding an image link.
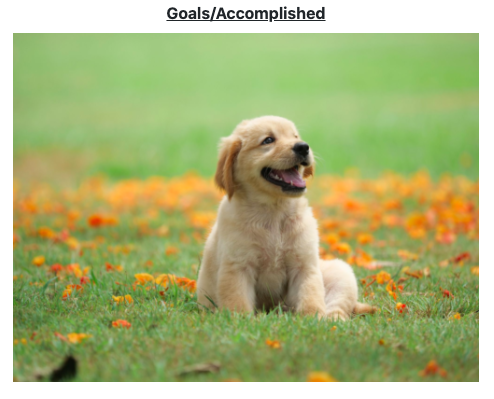
In Markdown Mode, this could be done with .
Other Pages
Statistics
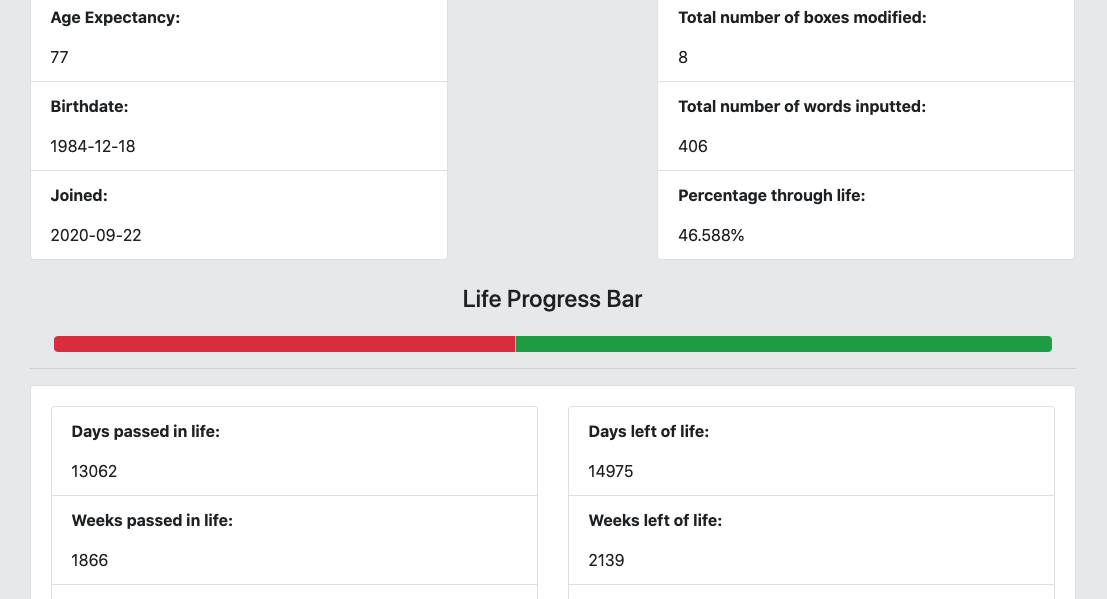
The /statistics page holds a plethora of statistics related to your account and
usage of
Life Calendar — it's especially useful for registered users. This is the information that you can view:
- Initially inputted values
- Age expectancy
- Birthdate
- Date joined Life Calendar
- Usage statistics
- Total number of boxes you have modified
- Total number of words you have every typed in boxes
- The date that you joined Life Calendar
- Generated statistics
- Days, weeks, months, years, and decades passed in life
- Days, weeks, months, years, and decades left in life
- Percentage of the way through life
- Percentage of the way through life as a visual color bar
- Legend statistics
- All legend colors used
- All legend tags/meanings
- The number of times that you have used each legend color
Goals
The /goals page is where you can set and track goals for your life. It's (hopefully)
very intuitive, but we'll quickly outline how it works for the sake of clarity.
When you first go to the page, you'll be greeted by a relatively-empty looking area with a single, centered card. This card is your template card, and it's like a best friend — it will always be there for you at the bottom of the page. You can use it to generate goals for yourself. Let's take a look at how we might generate our very first goal!
I've been learning Mandarin Chinese this summer, so I'll use that as an example. We'll be building the goal below.

- First off, we come up with a title, optional subtitle, and details for our goal. In my case, I'm
going to put that I'd like to be able to read an A1 level text in Simplified Chinese within the next
two months.
Try to make sure that your goals are S.M.A.R.T. — specific, manageable, attainable, relevant, and time-based. This will help you stay motivated and not set too big of a goal for yourself. - Next, we need to come up with a due date and optional due time (set to 11:59 PM by default). Although you won't get a warning when you pass these limits, it's still useful for when you periodically visit life calendar or want to see when you created a goal or if something is overdue. I think I'll be able to reach A1 reading quite quickly, so I'll set mine to the 1st of November, 2020.
- Lastly, we submit! You should know see your beautiful first goal card having popped up in front of the 'template card'. This goal card is fully editable — you can change the title, subtitle, text, and everything else by clicking 'Edit' at the bottom and then 'Save Changes'. Likewise, you can delete the card — but ensure that you want to do this, it is irreversible!
One last thing to note is the radio buttons at the bottom of the card. There are four options — 'not started', 'in progress', 'complete', and 'cancelled'. You can select whichever one of these you want, and the card will be outlined in that respective color. This is yet another visual way to see your life and your goals at a glance.
Download
The /download page is where you can download your very own life calendar! This can
be
printed out or simply saved digitally to your device.
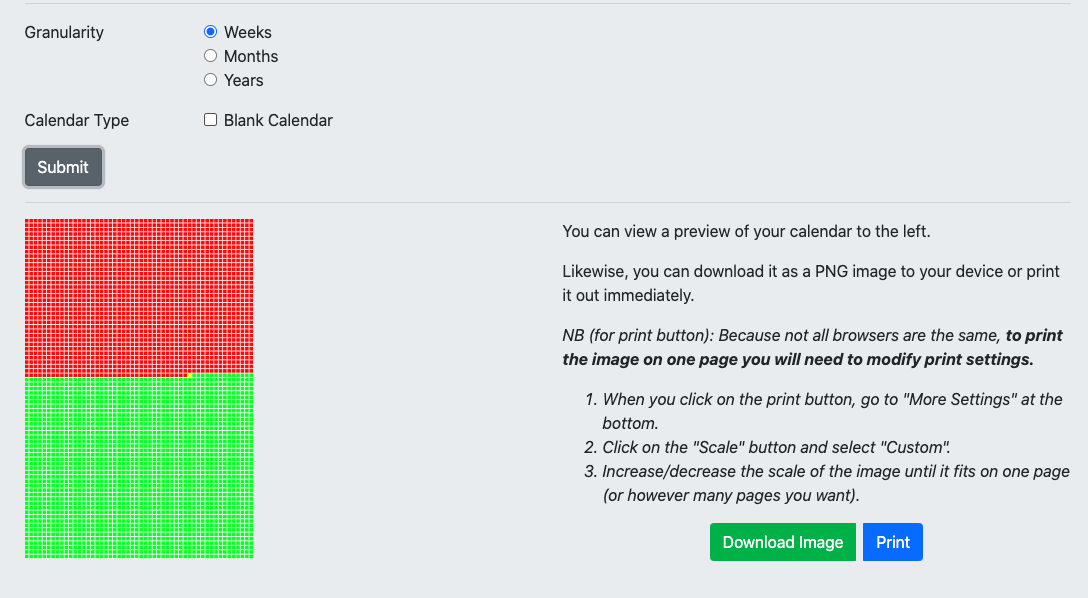
There are further instructions on the actual page, but essentially, you have the options outline below (for both print and download, scaleable). A 'colored' calendar means that it is outlined based on your current life calendar (without custom shading) and 'blank' means that it provides only boxes for you to annotate yourself.
- Colored + Blank Week Calendar
- Colored + Blank Month Calendar
- Colored + Blank Years Calendar
Days and decades have not been included as they would either be too small or too big to fit into an aesthetically pleasing image.
Closing Notes
To conclude, Life Calendar is your diary, todo planner, and bucket list all wrapped into one. You can easily access it anywhere, and we sincerely hope that you'll find this useful and gain a new perspective on your life.
If you have any more questions about the site, you can raise an issue on the GitHub page or shoot me a message via email.